How to Tile a Bathroom Like a Professional: A Step-by-Step Guide
How to Tile a Bathroom Like a Professional: A Step-by-Step Guide
Tiling a bathroom can seem like a daunting task, but with the right tools, preparation, and patience, you can achieve a professional-looking finish without the hefty labor costs. Bathroom tiles not only protect your walls and floors from moisture but also play a key role in the overall look and feel of the space.
Whether you’re refreshing a tired bathroom or tackling a full renovation, this guide will walk you through every stage of tiling — from planning and preparation to grouting and finishing touches.
Why Tile Your Bathroom?
Tiles are one of the most practical and stylish materials for bathroom walls and floors. Here’s why:
-
Durability: Tiles can withstand years of water exposure, humidity, and daily wear.
-
Easy Maintenance: Ceramic, porcelain, and stone tiles are easy to clean and resistant to stains.
-
Design Versatility: With endless colors, textures, and patterns, tiles let you customize your bathroom exactly as you like.
-
Value Addition: A well-tiled bathroom enhances your home’s appearance and market value.
Tools and Materials You’ll Need
Before you start, make sure you have all the necessary tools and supplies. Having everything ready will save time and prevent frustration later.
Tools:
-
Tile cutter or wet saw
-
Tile spacers
-
Spirit level
-
Tape measure
-
Notched trowel
-
Grout float
-
Mixing bucket
-
Sponge and clean rags
-
Pencil and straight edge
-
Rubber mallet
-
Drill with mixing paddle (optional for adhesive and grout)
Materials:
-
Tiles (ceramic, porcelain, or stone)
-
Tile adhesive (cement-based or ready-mixed)
-
Grout
-
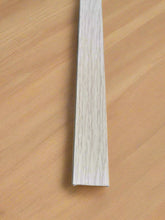
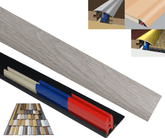
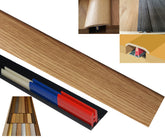
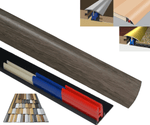
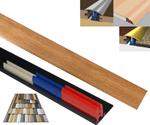
Tile trims (for edges and corners)
-
Tile primer (for porous surfaces)
-
Sealer (for natural stone tiles)
-
Waterproof membrane (for shower areas)
Step 1: Planning Your Layout
Planning is the foundation of a great tiling job. Start by deciding on the layout, pattern, and grout line width. Consider the tile size and how it will align with key features like sinks, windows, or corners.
Tips for Planning:
-
Always start from the center of the wall or floor and work outward to ensure symmetry.
-
Use a chalk line or laser level to mark straight, horizontal and vertical guides.
-
Avoid narrow or awkward tile cuts at edges — adjust your layout to keep cuts even on both sides.
-
If tiling a floor, check that it’s flat and stable before proceeding.
Step 2: Surface Preparation
A clean, smooth surface ensures that tiles adhere properly. Any unevenness or debris can cause tiles to sit unevenly or crack later.
-
Clean the Surface: Remove old adhesive, paint, and dust.
-
Repair Damages: Fill holes or cracks in walls or floors and allow them to dry.
-
Apply a Primer: If tiling onto plasterboard, concrete, or porous surfaces, apply a tile primer to improve adhesion.
-
Waterproofing: Use a waterproof membrane around showers, baths, or wet zones to prevent leaks and moisture damage.
Step 3: Mixing and Applying Tile Adhesive
Tile adhesive can be either ready-mixed or powdered (to be mixed with water). Powdered adhesive provides more strength and is preferred for bathrooms and wet areas.
-
Follow the manufacturer’s instructions to mix adhesive to a creamy, lump-free consistency.
-
Using a notched trowel, spread a thin layer over a small section of the wall or floor (around 1m² at a time).
-
Hold the trowel at a 45-degree angle to create even ridges, which help the tile bond evenly.
Step 4: Laying the Tiles
Now the fun part — laying your tiles!
-
Start from the Center Line: Press your first tile firmly into place along your guideline.
-
Add Spacers: Insert tile spacers between each tile to maintain consistent grout lines.
-
Check Levels Frequently: Use a spirit level to ensure tiles are straight and even as you go.
-
Tap Gently: Use a rubber mallet to lightly tap tiles into place for a uniform surface.
-
Cutting Tiles: Measure and mark tiles that need trimming, then cut them carefully using a tile cutter or wet saw. Always wear safety goggles and gloves when cutting.
Work in manageable sections, cleaning away any excess adhesive before it dries.
Step 5: Tiling Around Obstacles
Bathrooms are full of tricky spots — pipes, corners, and fixtures.
-
For pipes: Use a tile hole saw or tile nipper to cut a clean circular opening.
-
For corners: Measure twice and cut once for precise fitting.
-
For edges: Use tile trim for a neat, professional-looking finish where tiles end.
Patience is key here — rushing cuts can waste tiles or create uneven lines.
Step 6: Allow to Set
Once your tiles are in place, allow the adhesive to set for at least 24 hours before applying grout. Avoid walking on floor tiles or exposing wall tiles to moisture during this time.
Step 7: Grouting the Tiles
Grouting seals the gaps between tiles and protects against moisture.
-
Mix the Grout: Follow the package instructions until smooth.
-
Apply with a Grout Float: Spread the grout diagonally across tiles, pressing it firmly into the joints.
-
Remove Excess Grout: Hold the float at a 45-degree angle and scrape off any excess.
-
Clean the Surface: After 10–15 minutes, wipe the tiles with a damp sponge to remove residue.
-
Final Buffing: Once the grout has dried, polish the tiles with a soft cloth for a spotless finish.
Step 8: Sealing (Optional but Recommended)
If you’re using natural stone tiles or porous grout, apply a sealer once the grout has cured (usually after 48 hours). This helps prevent staining and makes future cleaning easier.
Step 9: Finishing Touches
Your bathroom tiling is almost complete! Finish the job with these small but crucial steps:
-
Reinstall fixtures: Attach towel rails, mirrors, and shelves carefully to avoid damaging tiles.
-
Seal joints: Apply a line of waterproof silicone sealant around baths, sinks, and corners to prevent leaks.
-
Final clean: Use a mild cleaner to remove dust or adhesive residue and admire your handiwork!
Common Mistakes to Avoid
-
Skipping Surface Prep: Dirty or uneven walls can lead to tiles falling off.
-
Incorrect Adhesive Application: Too little adhesive creates hollow spots that can crack later.
-
Inconsistent Grout Lines: Always use spacers for perfect alignment.
-
Rushing the Drying Process: Give adhesive and grout enough time to set fully before sealing or using the bathroom.
Final Thoughts
Tiling a bathroom may take patience and precision, but it’s an incredibly rewarding DIY project. Not only will you save money by doing it yourself, but you’ll also gain the satisfaction of transforming your space with your own hands.
By following these steps carefully — from planning and preparation to grouting and sealing — you’ll achieve a beautiful, waterproof, and long-lasting tiled bathroom that looks like it was done by a pro.


